

Of all of the AR builds I’ve done over the years one of my grail builds was a Colt 601 clone. The Colt 601 was the first AR-15 model produced by Colt after they purchased the rights for the design from Armalite in 1959. Colt made less than 14,500 of the 601’s with the majority of them going to the U.S. Air Force, a much lower number to the U.S. Army, and a few for the Navy SEALS. The rest of production went to overseas military units and police departments according to Retro Black Rifles (which is a great resource for early M16 models and variations).
A couple of years back a lot of police surplus guns and parts from Puerto Rico became available here and they included a fair number of de-milled Colt 601’s. The parts kits varied in condition, but they all brought substantial money ranging anywhere from around $1500 to $4500 or so. Still, they were perfect for folks looking to build an original-as-possible 601.
My First Attempt
I’ll start by saying that I wasn’t one of the ones who bought one of the 601 kits from Puerto Rico. Partially, it wasn’t really on my radar at the time, and partially the price was a little rich for my blood. My first attempt at a 601-ish build honestly wasn’t very close. I put together a rifle that had the general flavor of a 601, but lacked most of the particulars.
I used a slick side upper, a 20-inch 1:7 twist pencil barrel, an old open prong flash hider, a random bolt carrier group that I had laying around, and put it on an A2 profile Palmetto State Armory Stealth lower that I completed using an Anderson Arms lower parts kit and some other odds and ends. The finish was black anodized and I got the OD green Brownells retro furniture, added an old GI web sling, and called it good.
Honestly, it was okay for something with that early look and feel and I liked how it handled, but after building it and then diving more into the originals, I started buying the parts to make it more accurate. In the end the only parts I kept were the upper, a couple internal parts, and the sling.
The Journey to 601 Fulfillment Begins with a Can of Paint
Over the course of a year or so I did a lot more reading on the 601, looked at pics of originals, looked at other guys’ clone builds on the AR15.com M-16 Retro forum, and asked a lot of questions. I decided that it was worth trying to do a better job on my build.
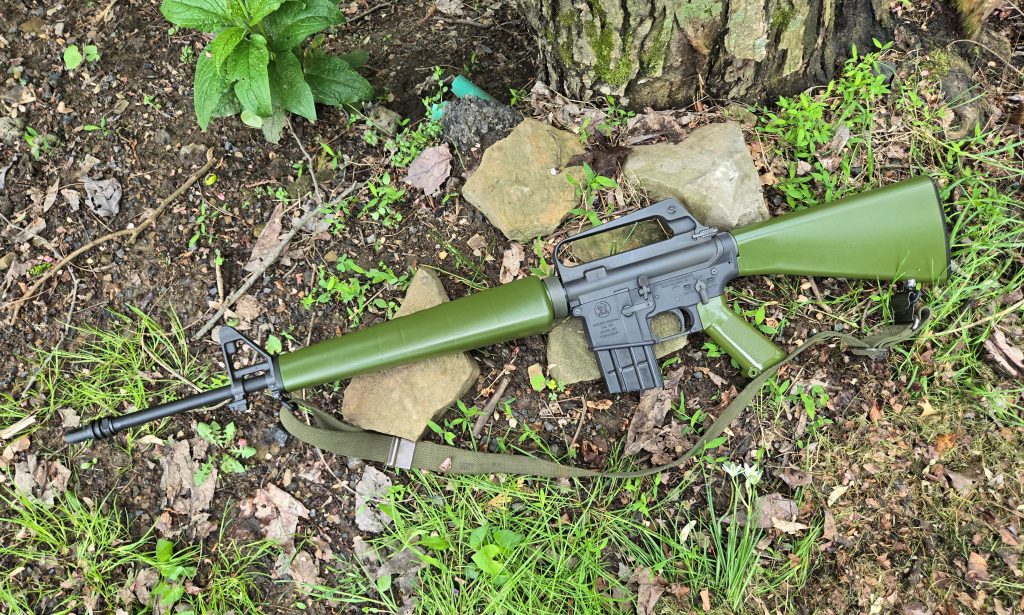
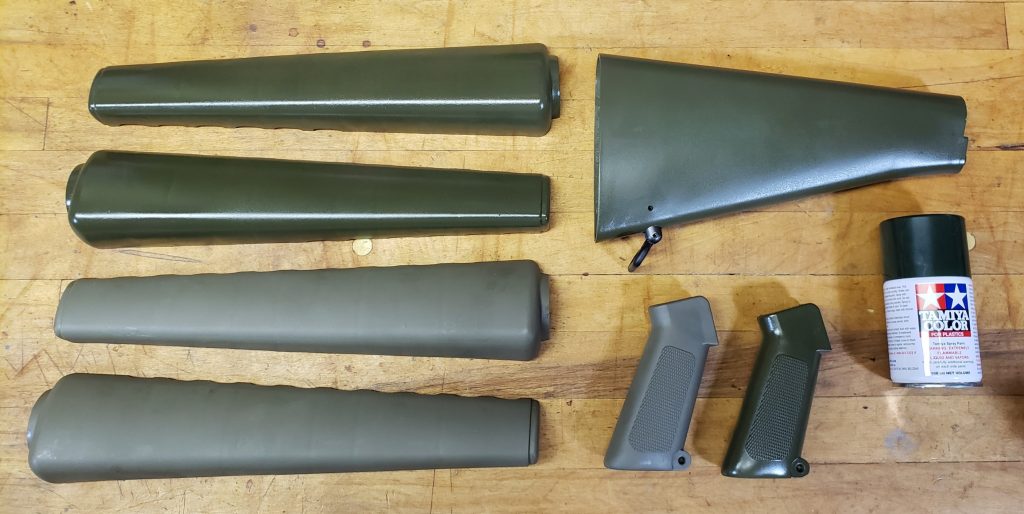
One of the first things I did was paint my stocks. I ended up doing a couple of versions. The earliest Colt 601’s had brownish Bakelite stocks, but after the first few hundred they started painting them with a green epoxy primer. That lasted until near the end of 601 production. A lot of those green painted 601 stock sets that survive were later painted black, but I always thought the 601 with green furniture really stood out, and that’s why I used the green Brownells furniture to start.
The problem was, it was the wrong shade of green. The Brownells green was a dull matte finish and looked too light compared to pics of originals. There was a lot of debate in the various build forums on what the right color was, but one of the colors I saw pop up frequently was Tamiya Spray Lacquer in Ts-5 Olive Drab, which was a paint used by folks doing military vehicle models. I grabbed a can, did a couple coats on my Brownells stocks and added a couple coats of clear finish to protect it. I was pretty happy with how it looked. Well, I was happy until one of the guys on the Retro forum discovered the original paint that Colt used and found out that it’s still made.
It turns out that they used a marine primer that was widely used on military vehicles and aircraft. The original version was chromium based and fairly toxic, but a phosphate version was available in the correct shade from Moeller, who made the paint back in the day. I ordered up a can of Moeller Green Zinc Phosphate Primer and rather than respray my first set of furniture, used a second set of Brownells brown retro furniture as my base.
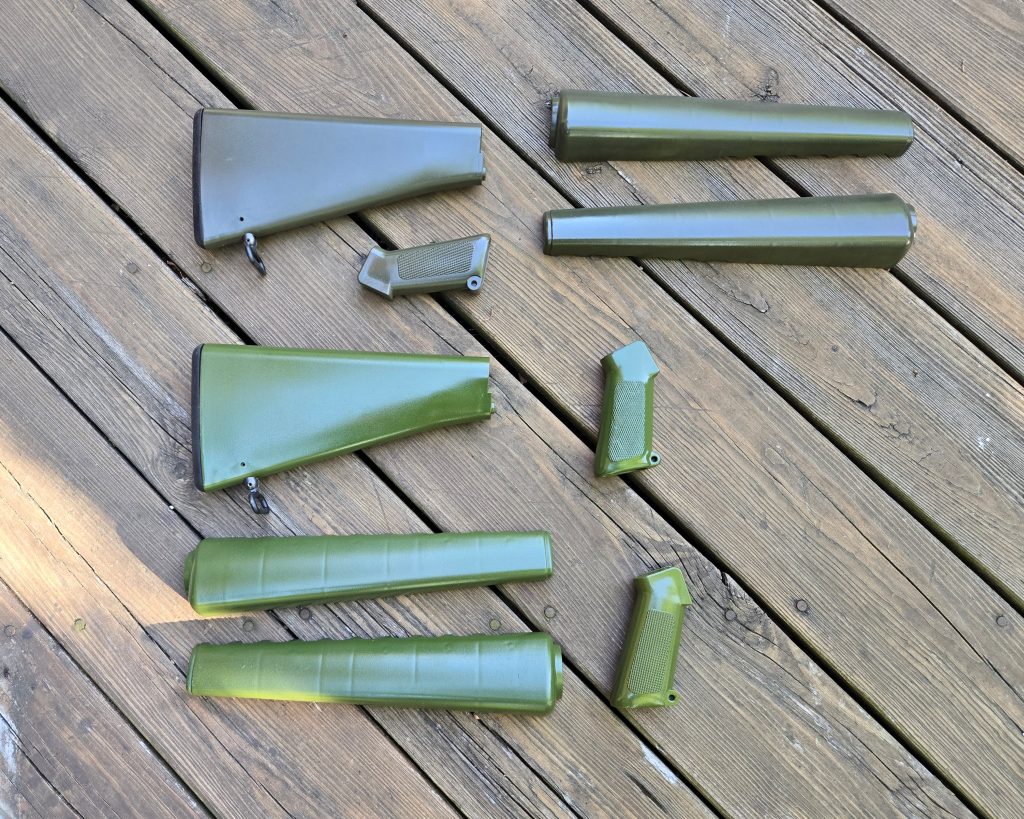
I used brown this time so that if it showed through when the paint began to wear, it would look closer to the originals that showed the brown bakelite underneath as showed wear.
It took me a number of tries to get a smooth, even finish, but I eventually managed it. I did three coats, plus all of the touch-up work needed to even it out. I then did three coats of Moeller Clear Coat lacquer to protect the paint. The end result os a pretty shiny, vibrant green. It’s technically correct, but it sure is bright. I almost ended up going back to the Tamiya OD green instead even though I knew that wasn’t the right color. To my eye it looked better.
Before I gave up though, I decided to knock the shine down by rubbing the stock down with some bronze wool. That knocked off some of the luster and actually ended up wearing through down to the brown on a couple of the high spots where I probably hit it a little too hard. The end result, though, was much better. It was still bright, bit not nearly as shiny as it started, and the wear spots actually give it some character.
The Metal Bits
Meanwhile, I was also working on all the actual gun bits. Harrington & Richardson was doing the correct profile and configuration 601 lower, with the correct Model 601 and Cal. .223 markings like the originals. Of course they had the H&R logo and markings as well, which I was okay with. This was still way more original than my PSA A2 lower, and I was never going to try to pass it off as original. Kudos to H&R for making the lowers to begin with. I’m more than happy to have their name on the rifle giving them credit for their work.
The lower was gray anodized, as was correct for the originals, but my slick side upper from Luth AR was black. That was nothing that a little Norrells Gray-Black Colt Moly Resin couldn’t fix. I used used the 1:7 twist barrel I had on my first 601-ish build on my Fallout Service Rifle project and got a more proper 1:12 twist barrel from Brownells. I say “more proper” since 1:12 is closer to correct, but the originals were actually a 1:14, which no one makes a reproduction of that I’m aware. The 1:12 was close enough for me. I added a duckbill flash hider that I got from Linemount to replace the open prong flash hider I had used initially.
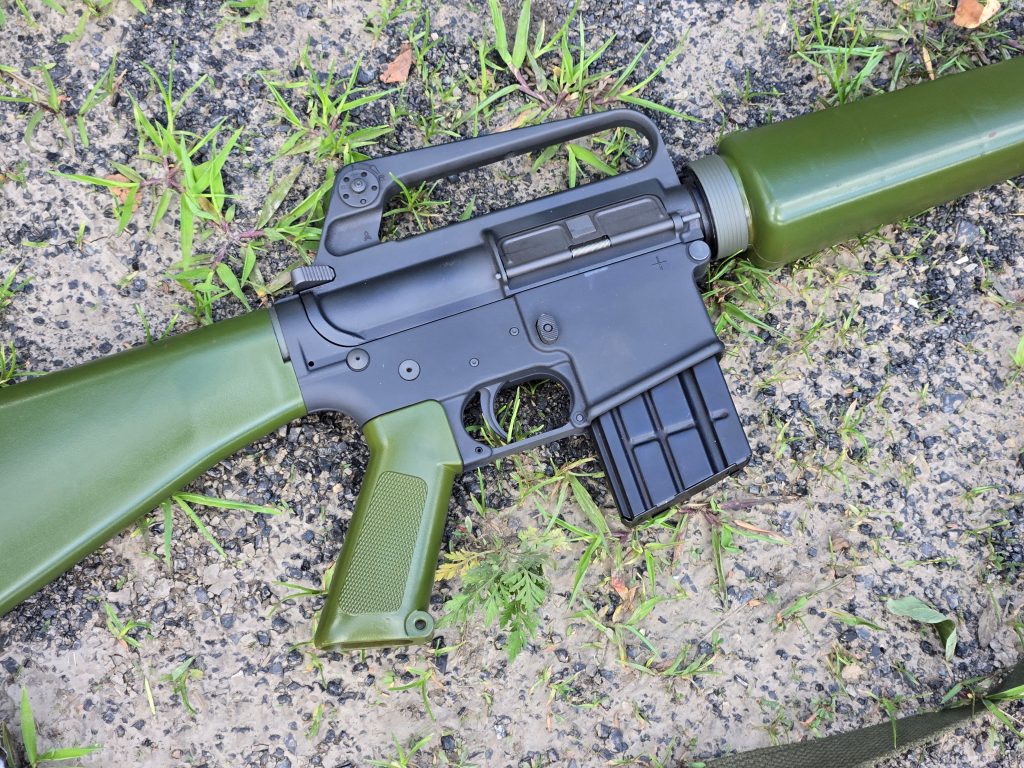
For the upper I used a Luth AR A1 rear sight kit, although I swapped the windage knob out with a 601 style from AR15Sport. I got the correct ejection port door from AR15Sport, too. The charging handle is a gray early 601 style from Luth AR, and the BCG is chrome with no forward assist cuts from Brownells. The flat slip ring was one I had in my parts bin that I painted parkerized gray with Brownells AlumaHyde II since I didn’t like how shiny it was.
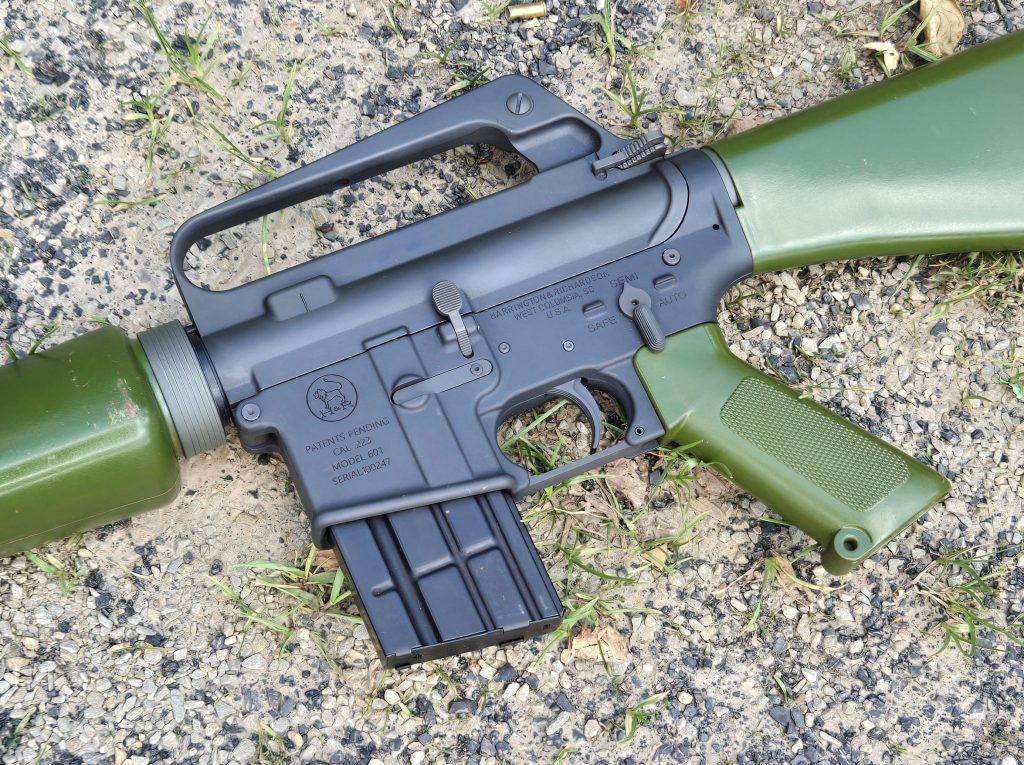
As for the lower, most of the small parts, including the trigger pins, are 601 style from AR15Sport. The exception is the fire control assembly, which is actually still the same Anderson one I originally used except I painted it Colt Gray with Moly Resin, and the Colt 601 style front pin that I got from Brownells. 601 parts differ from later M16’s in a number of unique aspects from the dimples on some of the parts (which weren’t present in all 601’s) to the shape of the bolt hold open lever, and grooves on the magazine release. Some of them are small details, but I figured if I was trying to make a more correct 601, I may as well get as close as I can short of an original de-milled parts kit.
The rifle buffer tube was from AR15Sport but was black, so I hit it with Brownells AlumaHyde as well, even though you only see a bit of it sticking out between the stock and receiver. I had an Aero Precision rifle buffer and spring in my parts bin from a previous trade.
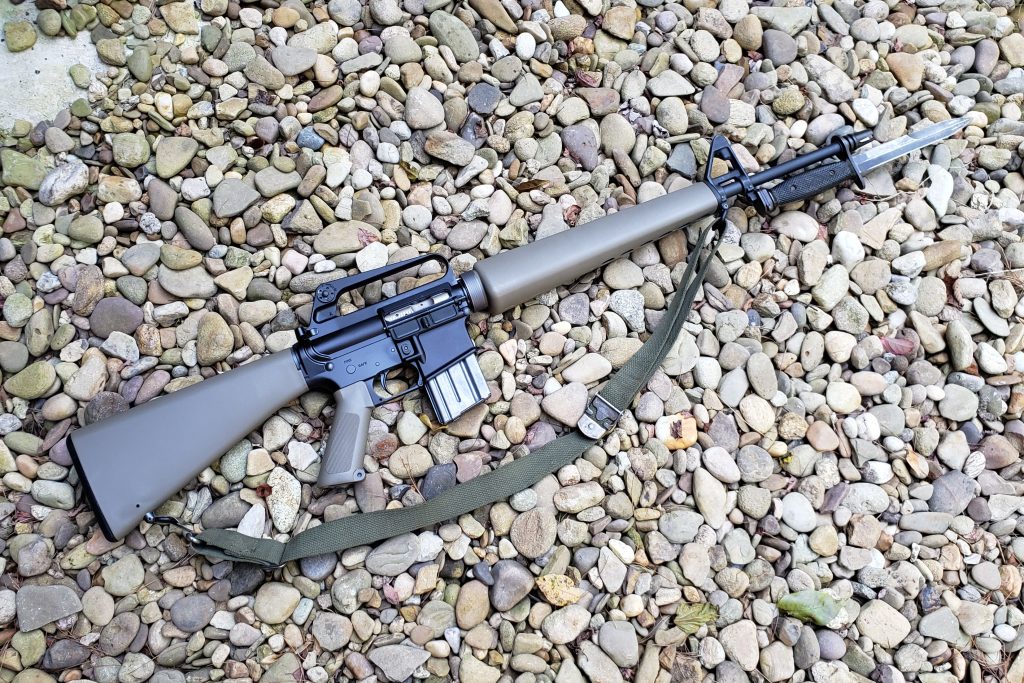
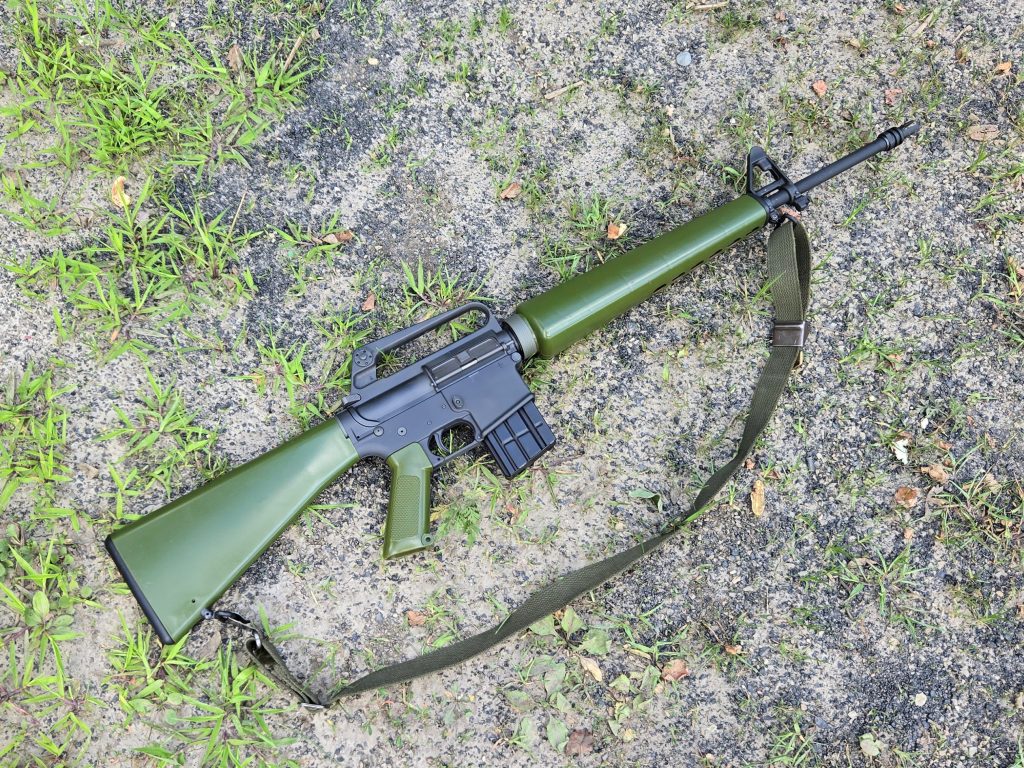
Finishing details were a waffle pattern 20-round magazine from H&R, and an old OD green cotton sling which is close to what the 601’s used. The 601’s differ in that the hook portion of the sling is actually sewn on rather than retained by a buckle. They’re basically unobtanium though, so I’m calling this one good enough. The last thing I did was to get a set of retro M7 bayonet scales from Cogburn Arsenal and paint them OD Green. They come in green, but like the Brownells stocks, it’s not the right shade. I did these with the Tamiya OD and have considered redoing them with the Moellers, but for now I’m leaving them as-is.
Range Time
With everything finally put together it was time to see what the rifle would do. Sometimes I feel like I spend so much time tinkering and building that I forget you’re supposed to shoot the darn things, too. When I hit the range I had a couple of failures to feed with the first couple of mags. I did a careful once-over and everything looked okay. The only thing I noticed was that the magazine didn’t seem to be engaging positively. I had the mag release threaded down pretty tightly and ended up backing it off maybe two turns. I wouldn’t have thought that would have been an issue, but once I did that magazines locked in and dropped more positively and my feed issues went away.
The 601 rifle really is pretty sweet to shoot. Like any A1 with a pencil barrel, it’s light and handles easily. The rifle-length gas system and fixed buttstock with rifle buffer make for a very smooth-shooting gun, too. I was pleased to see that my sights were dead on and didn’t need adjusting, at least at plinking ranges. I terrorized Daisy Shatterblast clay targets scattered on the backstop and Caldwell self-healing targets.
I keep telling myself I’ll sit down and put my fun builds on paper someday, but honestly, I just like going out and kicking reactive targets around. I may get to it someday. Or I may not.
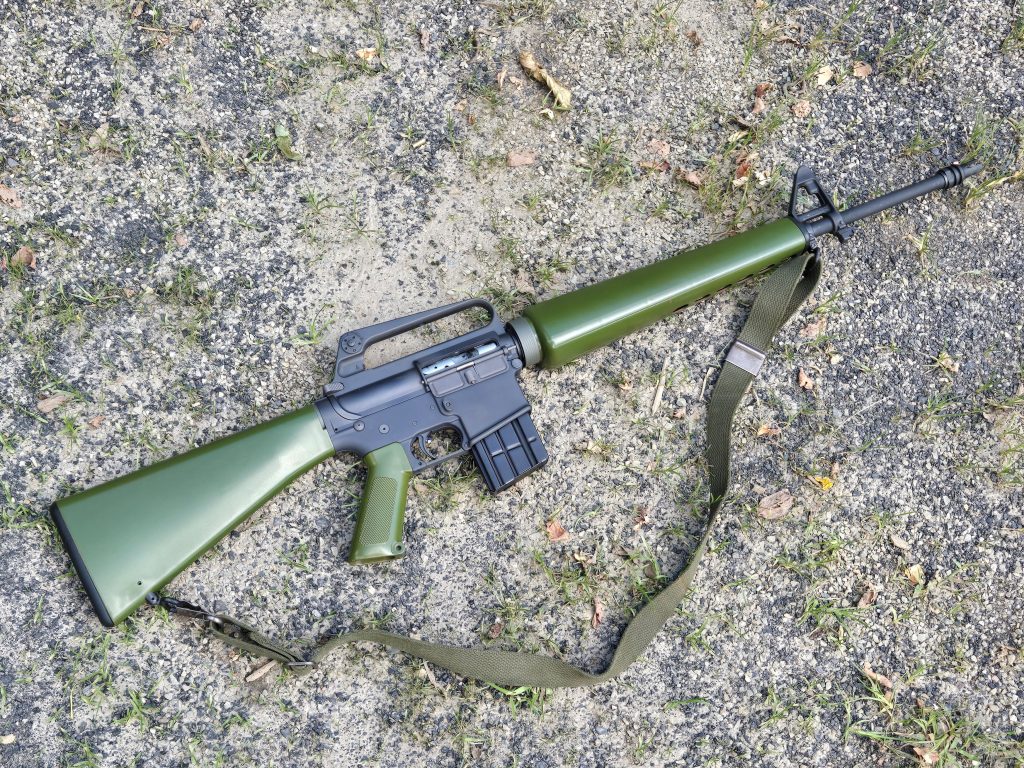
The Finished Product
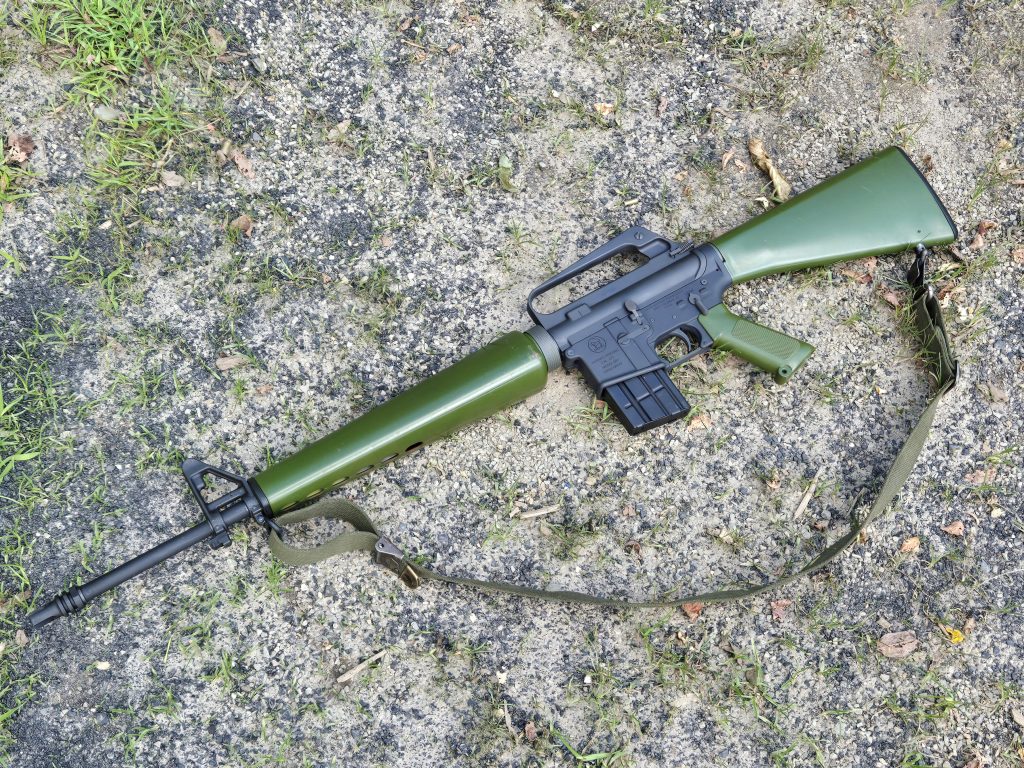
It took me a year or so to gather all of my parts, get the finishes I wanted on them, and put it all together. The final product is a pretty nice representation of an early Colt 601. It’s not perfect and the 601 gurus can (and will) certainly point out some of the issues, but it’s closer to correct than I figured I’d get when I first started down this path.
A clone is never going to be exactly like the parent gun it’s based on by its very nature, but its nice seeing how close you can get. Sometimes I’m okay with the getting the right flavor, even though the ingredients may differ a bit, but the 601 became something of an obsession and was a grail build for me. The only way I think I could get closer would be to pony up for one of those original 601 parts kits, and they’ve gotten even harder to find and more expensive since the guys who were more invested than me snatched them up years ago.
Great build, but your sling setup has me triggered! As was drilled into me by the USMC the smooth side of the front sling clasp is always oriented away from rifle, so that the latch is hidden.